|
|
|
|
|
|
|
|
|
|
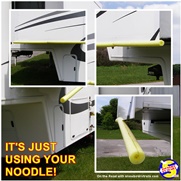
The Old Stinky Slinky vs The New and Improved |
|
|
|
|
|
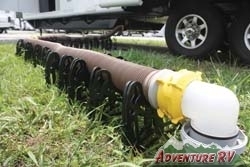
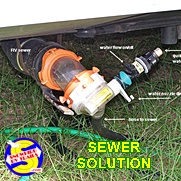
We are on the road at least six months or more each year. We stopover, on average, at thirty campgrounds each year. This has necessitated that we carry extra sections of the 4" hose and various connectors that would fit any situation we ran into. This assortment was all carried in a large plastic tub with a cover that took up a LOT of space in our basement compartment. We started researching the macerators that were on the market. There are a couple of different types requiring connections to the RV's 12 volt system. Yes, we were skeptical from the beginning though the reviews we found raved about the product and the good job it did. The reviews convinced us to buy it and try it. We did and it does! |
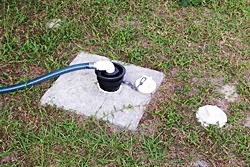
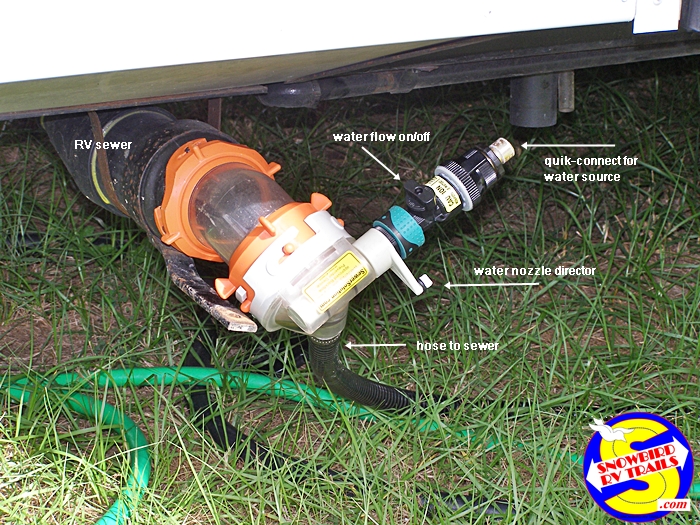
Manufacturer's Instructions: Simply connect the SewerSolution pump to the RV sewer pipe like you do the 3" hose, insert the Sewer Adapter into the sewage receiver and connect a garden hose to power the SewerSolution. (Make sure an approved Vacuum Breaker device is connected in the garden hose.) Start the garden hose and open the RV gate valve. Sewage passes thru the RV sewer pipe and gate valve into the SewerSolution. The patented Jet Pump will shred and pump waste thru the Discharge Hose. STEP 2 - FLUSH RV WASTE SYSTEM (optional). Rotate the Jet to shoot water back up the RV Sewer Pipe, flushing the tank with clean water. When the sewer tank fills with adequate flush water, repeat Step 1 and dump the flush water. This cycle of 'in with the good water and out with the bad' may be repeated as desired to remove waste. All you have to do is flip the Selector Handle a few times. (Note that depending on the configuration of your RV’s sewage pipes, the SewerSolution may not flush water back into your tank.) STEP 3 - CLEAN Close the RV gate valve and rinse everything downstream of the gate valve with high pressure, clean water. The RV sewer pipe, SewerSolution pump and the Discharge Hose are completely cleaned! You will finish the job clean and begin clean the next time! It’s that easy and no more old style, bulky hoses. |
|
|
|
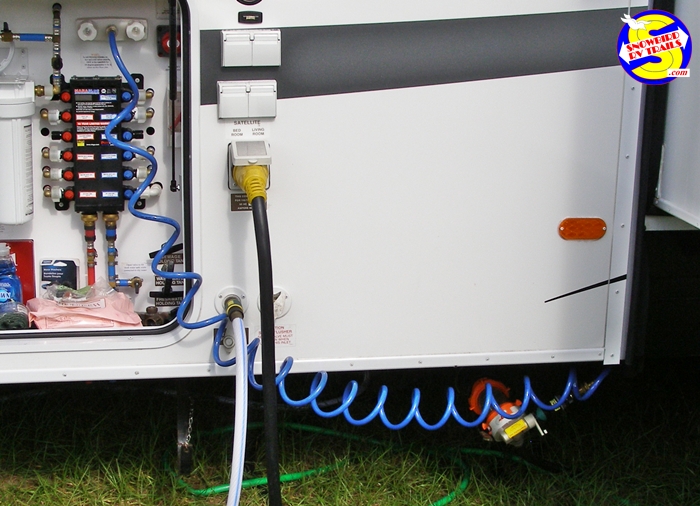
| 08/2016 - After using the Sewer Solution for nearly three years it deserves some follow-up observations. We have used it at 60+ campgrounds since installing it and have had no problems. I would suggest you buy the 10' extension hose so that you have 20' of discharge hose for those sewer pipes that end up behind your rig rather than beside it. We use only the Scott single-ply "Extra Soft" toilet tissue and nothing goes down the toilet that is not biodegradable. We've had no clogs whatsoever even when we shut the watersource off and let gravity drain the tank for a short period. We do carry a 10' section of slinky for emergency use at dump stations when needed but no such problems exist with standard campsite sewer hook-ups (even those where you have to pump uphill into those elevated sewer pipes). There is some talk of the tabs or nubs breaking at the point the SS is connected to your rig's sewer pipe. To alleviate any possibility of that happening from repetitive connections - install a clear 45 degree swivel fitting After three years we would recommend it to anyone and we would not trade it to go back to the old system. Finally, you can order end caps online that will close both ends of the SS making it leak proof and much less messy for rollup and travel. We coil it, put it in a bag and carry it weighed down by our electric cord in the bed of the truck. You can purchase Sewer Solution through Camping World but Amazon does seem to have the better price. It has worked like a charm for us and no electrical connections needed! |
|
|
|
|
|
Some of the Gadgets, Fixes and Gizmos we have added to our RV to make RV life a little easier & more fun! Send any comments or questions about any of the above to Jack & Niki at: snowbirdrvtrails@gmail.com
|
||||||||
|
|
||||||||
|
|